Map of Twitter Link Chain

TL;DR

I used Breadth-first Search to map the link chain that’s currently making its way around twitter. So far, the data shows:

(This is current as of around 11am on Feb 14, 2014):

  1. Clustering coefficient: 0.002
  2. Characteristic Path Length: 19.995
  3. Average Number of Neighbors: 2.016

Note about the image at the top: The larger and more skewed towards red a particular tweet is, the more link backs it has.

If you’d like to play around with a high-res version of that image above, check it out here.

Code available here: Fork and Pull Request Away!

Oh, and for the record, it all started here with a link to a 404 page.

Intro

Like many of you, the past few days my Twitter feed was inundated with several tweets claiming to link to something so shocking and controversial I had to see it right now. I’m not usually one to fall for obvious link bait, but I gave one a go.

And then I clicked on the link in the status I was led to.

And I clicked on the link there.

And then I caught on. I’d fallen for Twitter’s newest bit of viral fun: the link chain.

What is this link chain?

If you haven’t see it, there are several links going around that send you on a wild goose chase through the world of Twitter. Somebody posts a link, claiming its points to some extremely shocking story, but it really just links to another twitter status. That status, then, links to another. And so on and so forth.

And the prize at the end of the tunnel? A 404 error. Nice.

I didn’t end up jumping in and spreading the link forward, but it did get me thinking: what must this massive link chain look like? How does something like this get started, and how far does it spread?

Enter Ruby and Breadth-first Search.

Mapping the Chain: The Problem

I’d played around with Breadth-first Search once or twice before, and I figured this problem felt like a great use case for the algorithm. If you think about this chain of tweets as a series of nodes and neighbors, it breaks down somewhat like this:

  1. Take any random tweet that has one of these links in it
  2. It’s neighbors are any tweets that, in turn, link back to it

Seems pretty straight forward, right?

Not so fast. There were two primary problems that arose quite quickly:

  1. How in the heck do I find the tweets that link back to a particular status?
  2. A Breadth-first search (from here on out, to be referred to as BFS) sort of assumes you are starting at the “beginning” of something and expanding from there. I was actually starting somewhere in the middle of this chain.

The first problem turned out to be pretty easy to solve, after realizing one particular quirk of the Twitter search API.

Finding the Neighbors

Since every tweet that links back to a particular status, by definition, contains that status’ link as some text, I could just do a search for the tweet of interest’s URL.

There was only one problem with that: the Twitter search API is case sensitive, while usernames aren’t. Therefore, one tweet’s status could be linked to in any number of ways.

The solution? Search for the tweet’s ID. Duh. Sadly, that took my a couple of hours to figure out.

Going Back to the Beginning

The other problem took a bit more time to figure out. It turns out, though, that the key to it was the realization that it was, in fact, pretty simple to figure out where the beginning of the whole link chain was.

I just had to write a simple bit of code to get back to the beginning from any tweet in the chain:

1
2
3
4
5
6
7
8
9
10
11
12
13
14
15
16
17
18
19
20
21
22
23
24
25
26
27
def self.get_first_tweet_hash(starting_status_url)
  id = starting_status_url[/(\d)+$/].to_i
  link = true
  while link
    begin
      tweet = CLIENT_ONE.status(id)
      puts "#{tweet.user.screen_name}: #{id}"
      if tweet.urls
        id = tweet.urls.first.expanded_url.to_s[/(\d)+$/].to_i
      else
        link = false
      end
    rescue
      link = false
    end
  end

  {
    :username => tweet.user.screen_name,
    :id => tweet.id,
    :created_at => tweet.created_at,
    :retweet => tweet.retweet?,
    :retweet_count => tweet.retweet_count,
    :location => nil
  }

end

(Note: CLIENT_ONE is my interface to the Twitter Gem.)

Essentially, I look at a status, grab the link of that status, and go look at it. I do this until I find no more links. And then I have the beginning. I had to throw in the rather ugly begin rescue block because the last tweet happens to link to a 404.

Once I had the starting tweet, it was just a matter of starting the search.

BFS

I’ll let you read up on BFS, but here’s the code that actually runs the search:

1
2
3
4
5
6
7
8
9
10
11
def map_graph
  while !tweet_queue.empty?
    tweet = tweet_queue.shift
    tweet.get_neighbors.each do |neighbor|
      if !visited?(neighbor)
        add_to_path(tweet, neighbor)
        add_to_arrays(neighbor)
      end
    end
  end
end

In simple terms, you take a node and throw it into a queue. Then, you find all of its neighbors and throw them into a queue. Then, you take the first node from the queue and repeat. In this way, you traverse a graph, level by level, until you reach some pre-determined end point, or until there are no more nodes.

Plotting the Graph

I discovered the amazing Graph Gem which makes plotting directional graphs insanely simple. You get a digraph method that accepts a block, in which you define edges. At the end of the method, you can say something like save "file", "png" and you get a nice bit of output. You are also left with useful data in .dot file format, which is easily imported into other visualization software. (I happened to use Cytoscape for the graph at the top of this post.)

Here’s the code to plot the data:

1
2
3
4
5
6
7
8
9
10
11
12
13
14
def display_graph(traveled_path)
  digraph do
    traveled_path.each do |pair|
      start = pair[0] == nil
      if start
        edge "#{pair[1].username}: #{pair[1].created_at.strftime("%a %b %e - %k:%M")}", "Start"
      else
        edge "#{pair[1].username}: #{pair[1].created_at.strftime("%a %b %e - %k:%M")}", "#{pair[0].username}: #{pair[0].created_at.strftime("%a %b %e - %k:%M")}"
      end
    end

    save "test", "png"
  end
end

What makes this especially easy is the fact that the BFS algorithm leaves me with an array that contains the entire history of the graph in parent – child pairs. All it takes is a quick iteration through that array, and you have a fancy graph.

Considerations

There were a couple of logical considerations that had to be made in the course of running this search.

The biggest problem was dealing with the Twitter search API. It happens to only return about 100 results per search, and there isn’t any really good way to figure out the next page of results. You aren’t immediately made aware of the fact that there is a next page of results even. And without checking all results, you are bound to miss large portions of the graph.

To deal with this, I accessed a private method in the Twitter::SearchResults class of the Twitter Gem (linked to above). This rather sweet method returns the correct options for a search that would return the next page of results. So, in the get_neighbors method, I needed to keep making the same search (for a given status id) until there were no more pages of results.

The other problem was dealing with people who decided to throw recursive loops into the mix. Several users would jump into the chain, and then link to another status of their own. This created mini loops. Easy solve: reject any neighbors that have the same username as the current tweet.

Current Issues

There are still some problems to solve. The most major of which is the rate limiting that Twitter has on its search API. As it stands, it is about 180 requests per 15 minute block. For a graph of this size, that’s not nearly enough.

The other problem, which I’ve created a stop-gap for, is the issue of how to store progress if graph traversal has to go in spurts. Using YAML::Store, I keep track of the current node and the current state of all queues. This seems to work, but I fear that tweets get lost in between traversals.

Future Plans

I’m hoping to graph all of this data in much more meaningful ways. Since I’m collecting location data (for tweets that have it) and temporal data, it’d be really awesome to create an interactive, geo-located graph of this link chain spreading over time and distance. Furthermore, I am collecting retweet information, and am hoping to find meaningful ways to display that.

Help!

This is a pretty large map, and it’s pretty difficult to traverse it 180 requests at a time, running a cron job every 20 minutes. Because the data is being stored in YAML format, and the edges are stored in simple node pairs in a .dot file, it’d be pretty easy to distribute the graphing of this. Merging multiple .dot files would be rather trivial. If the larger open source community could jump on this and start graphing from different points in the map, we could make quick work of it. Fork the project on GitHub!

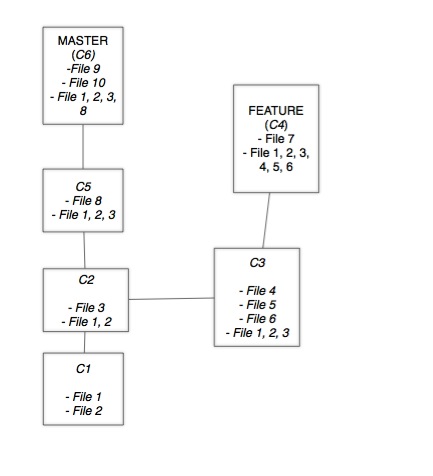
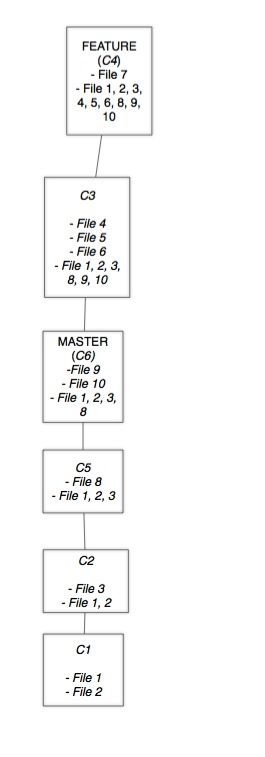
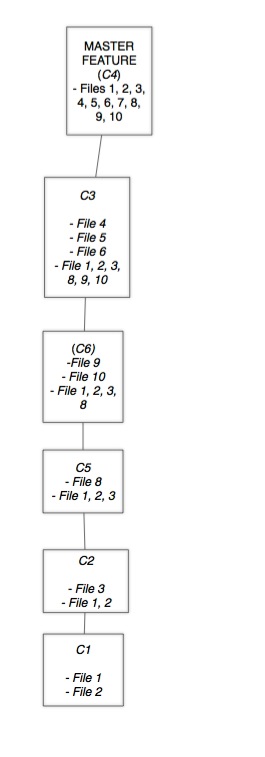
More Pretty Pictures

Full sized images can be found here. They are all pretty similar, but give a decently different view of the graph that I decided to post them all. There is also a PDF which allows for much more exploration of the graph.

Nerdy Graphs

Neighborhood Connectivity

In-Degree Distribution

Average Clustering Coefficient Distribution

Shortest Path Length Distribution

Comments

When running any Ruby application that contains more than one or two files, we generally find ourselves writing an environment.rb file to handle all of the require’s and require_relative’s for us. And, to be frank, this gets to be a giant pain in the ass, especially when you want to include files in a particular order. Luckily, there is a better way! Or, I guess I shouldn’t say better, but way, way easier.

Let’s imagine we have the following directory structure.

1
2
3
4
5
6
7
8
9
10
glob
├── a_folder
│   ├── file_one.rb
│   └── file_two.rb
├── b_folder
│   └── file_three.rb
├── environment.rb
└── x_folder
    ├── file_five.rb
    └── file_four.rb

Now, let’s say in our environment.rb file, we want to include all of the subfiles in a_folder, b_folder, and x_folder. To do this, we’d have to write a loop like this:

1
2
3
4
5
6
7
8
9
Dir.foreach('.') do |dir|
  next if dir.start_with?('.')
  if File.directory?(dir)
    Dir.foreach(dir) do |file|
      next if file.start_with?('.')
      require "./#{dir}/#{file}"
    end
  end
end

Essentially, it goes through the top level directory, skips any hidden files (those that begin with a period), finds everything that is a directory, and requires every file inside of each of them that isn’t a hidden file.

Phew.

I’ve written a puts statement in every file in this directory that looks like this:

1
puts "Hello from file one!"

But each file has it’s own number in the puts statement.

Let’s run environment.rb and see what happens:

1
2
3
4
5
Hello from file one!
Hello from file two!
Hello from file three!
Hello from file five!
Hello from file four!

So it did what we expected…it included every file, and it did it in folder order. What happens, though, if everything working properly depended on the files in b_folder loading before the files in a_folder. Say, for instance, that the files in b_folder make use of constants that are defined in files in a_folder. We’d have to adjust our loop:

1
2
3
4
5
6
7
8
9
10
folders = ["b_folder", "a_folder", "x_folder"]

def require_stuff(array)
  array.each do |folder|
    Dir.foreach("./#{folder}") do |file|
      next if file.start_with?('.')
      require "./#{folder}/#{file}"
    end
  end
end

Here, we put the loop into a method, and make an array of the folders we want to loop through. By changing the order of the folders, we can change the order the files are loaded in. Here’s the output from running that:

1
2
3
4
5
Hello from file three!
Hello from file one!
Hello from file two!
Hello from file five!
Hello from file four!

So, it worked. But man, that still sucks. What if we had more subdirectories that depended on being loaded in a particular order? This would very quickly get out of hand.

And this is where Dir.glob comes in handy. And makes you not hate loops. Everything we just did can be written in one line:

1
Dir.glob('./{b_folder,a_folder,x_folder}/*.rb').each {|f| require f}

And our output?

1
2
3
4
5
Hello from file three!
Hello from file one!
Hello from file two!
Hello from file five!
Hello from file four!

That looks pretty darn identical to me! Sweet.

Dir.glob is basically a regular expression matcher for file/directory paths. It doesn’t handle every regex you can throw at it, but it gets the job done for stuff like this way cleaner than our ugly loop. In this case, it iterates through each folder within the {} and calls require_relative every time it encounters a .rb file. And if we wanted to, say, include files in a different order? It’s as simple as changing the order of the directories.

Pretty neat, eh? And while it’s functionally doing the exact same thing as our loop (it fact, it’s also a loop), I find it way simpler to read and far easier to understand. Gotta love easily-digestible one liners.

Comments

When getting started with ERB (Embeded Ruby), you’ll undoubtedly come accross a weird little thing called binding. It won’t pop up all the time, but you’ll be minding your own business one day, reading tutorials, when suddenly you’ll see this:

1
2
3
4
5
6
7
8
require 'erb'

template = ERB.new(File.open('/blah/blah.erb').read)
some_variable = "This is a variable"

File.open('/some/html/file.html', 'w+') do |f|
  f << template.result(binding)
end

And then you’re like, “Whoa, whoa, whoa, what the heck is binding?” And then the tutorial says that you can’t access some_variable inside your '/blah/blah.erb' template file unless you pass your binding along as an argument with the .result method.

And then you’re like, “Ok, but whoa, whoa, whoa, what is binding?” And the tutorial says that you don’t have to really worry about it, and that you can do this instead:

1
2
3
4
5
6
7
8
require 'erb'

template = ERB.new(File.open('/blah/blah.erb').read)
@some_variable = "This is an instance variable"

File.open('/some/html/file.html', 'w+') do |f|
  f << template.result
end

And you get some explanation along the lines of, “Your binding is like a snapshot of your current environment. If you want your template.erb file to have access to any local variables, you have to pass along your binding with the .result method. This lets your template have access to your current environment and all variables defined within it.”

And you go, “Oh, ok. I guess that makes sense. Cool.”

And your friendly tutorial person ends with the note, “But really, you can just always define instance variables and your template.erb file will automatically have access to them without all this passing of binding around because it elevates their scope.”

And you think you get it. And you think the concept of binding is really cool. But you know that it’s weird to pass it around, so you just start whipping out instance variables, assigning them, and moving along with your day.

Until this happens (Let’s ignore for a second that this weird Dog knows how to make HTML…pretend it’s a special class that only generates HTML):

1
2
3
4
5
6
7
8
9
10
11
12
13
14
15
16
require 'erb'

class Dog

  def make_me_some_html
    template = ERB.new(File.open('/dog/dog_show.erb').read)
    @name = "Pooch"

    File.open('dog.html', 'w+') do |f|
      f << template.result
    end
  end

end

Dog.make_me_some_html

You open up, excitedly, dog.html, and…nothing. Literally nothing. No “Pooch”, no error. Nothing.

And you go, “Oh, well, I must have made a typo. There’s probably an error sitting in my terminal.” But there isn’t.

And then, after debugging for what seems like days, you try tacking on a (binding) to template.result as a last ditch effort to save face. So now your code looks like this:

1
2
3
4
5
6
7
8
9
10
11
12
13
14
15
16
require 'erb'

class Dog

  def make_me_some_html
    template = ERB.new(File.open('/dog/dog_show.erb').read)
    @name = "Pooch"

    File.open('dog.html', 'w+') do |f|
      f << template.result(binding)
    end
  end

end

Dog.make_me_some_html

Huzzah! It worked. It worked! Wait…why in the world didn’t it work before? It should have worked.

Here’s the thing. Binding is, indeed, a snapshot of your current environment. And before, when we defined instance variables and didn’t pass our binding with .result, it seemed like they were accessible by our template.erb because they were part of our current binding. And that was true.

The problem is, .result doesn’t actually take your current binding by default. Its signature reads as follows:

result(b=new_toplevel)

What’s actually going on here is our top level binding is being passed along with .result by default. And what is our top level binding? It’s essentially the environment in which main exists. So everything that is defined in our main object, except for local variables, (all method signatures outside of a class, all class definitions, all instance variables — fun fact, main does indeed have instance variables!, and all other constants) get passed as a parameter of .result by default as our binding. It just so happened that before, our top level binding was our current binding.

With this in mind, it makes sense that the above example with our Dog class only worked properly when we eplicitly sent the current binding as .result’s argument. The @name instance variable is defined within the scope of the make_me_some_html method in the Dog class. It is not part of the main binding, and therefore doesn’t exist in our template file without some help.

Comments

One of the greatest things about Ruby is its never-ending ability to momentarily bewilder you before exploding your brain all over your face. Whether it’s a seemingly supurfluous bit of syntactic sugar (point for alliteration to me, in case you’re counting) or a questionable method call where one doesn’t seem necessary, Ruby constantly has me scratching my head mere seconds before blowing me away.

My most recent moment of ermahgerd came when discovering the .send method. Here’s what it looks like when called on an Array:

1
2
3
4
array = [1, 2, 3, 4]
array.send(:[]=, 4, 5)

=> [1, 2, 3, 4, 5]

(The parenthesis aren’t necessary, but I like them for clarity. Up in the code. Not surrounding this sentence, silly.)

So what exactly is this doing? It looks wacky, fo sho. To break it down, let’s look at its equilavent in the way we normal human beings would most likely write it:

1
2
3
4
array = [1, 2, 3, 4]
array[4] = 5

=> [1, 2, 3, 4, 5]

So yeah, that’s different. To understand what’s going on with .send, which, by the way, ‘sends a message to a receiver’, we have to remember that array[whatever] is really array.[]=(index, value). Just because brackets are involved doesn’t mean a method isn’t being called (or that a message isn’t being sent). .send then, basically passes a method to an object, along with a couple of arguments, and then invokes that method.

Mini-break: What does this whole “sends a message to a receiver” or “passes a method to an object” stuff mean? At first, it’s kind of annoy…erm…I mean difficult to understand the oft-repeated refrain that “everything in Ruby is an object.” First of all, what the heck is an object? And second of all, so what? Here’s the quick and dirty deets, supremely over-simplified—when we say “object” we really just mean “thing”. And now I’m guilty of saying it myself: everything really is an object. Like, all the things are ojects. Every last one of them. And they’re just things that chill and wait for you to tell them to do stuff. Which is really cool, because all of these things can respond to a zillion different methods. And methods are little messages you “send” to these objects that tell them to do stuff. An object either understands a method or it doesn’t. So if we think about it really abstractly, let’s say I’m a Ruby object. (Sweet!) You could send me a method like .karate and I’d look at you like you’re crazy because my parents never let me do martial arts when I was younger and that was sad and I’ll stop rambling about that right now. But if you sent me a method like .drink_water I’d know exactly what to do—I can drink a glass of water like a boss—and I’d do it. This, in a nutshell, is what objects and methods are all about in Ruby. (Well, kinda. Maybe. You know what? Just keep moving…)

Now, back to your regular programming (hah!)

Cool.

Wait, why is it cool? Doesn’t it seem like an unnecessary step? After all, as we just decided, the following code would look just as weird, get the same thing done, and not use the .send method at all:

1
2
3
4
array = [1, 2, 3, 4]
array.[]=(4, 5)

=> [1, 2, 3, 4, 5]

(Ignore the weird syntax highlighting on that first bracket on line two—I think I broke the internet or something.)

So why bring .send into the mix at all? It just seems like extra…stuff, right? Well, what happens if we think about dynamically calling methods based on stuff that happens in our code? Or, even better, what if we want to call methods depending on user input? Then we can do some really cool stuff.

Well, I mean, somebody could do really cool stuff. I’m just going to show you how to make a silly, over-simplified, bot-type-thingy that sorta-kinda responds to user input. Ish.

1
2
3
4
class ChatterBox
  COMMANDS = [:hi, :how, :why, :when, :who, :where, :what, :bye]

end

Boom…done! Ok, kidding. But we’ve gotten started at least. Here we’re just defining a class called ChatterBox that we’ll be using to demonstrate a neat little use of .send that comes in handy. Maybe not brain-explode-all-over-your-face handy, but huh-would-you-look-at-that handy. The COMMANDS = [blah, blah, blah] bit is going to be useful in just a second. Actually, it’s going to be useful right now.

Let’s pretend for a second that we have some fancy pants command line interface that we can wrap around this sucker and that everytime a user types something in, that sentence gets passed to a .call method on our ChatterBox. Cool? Cool.

1
2
3
4
5
6
7
class ChatterBox
  COMMANDS = [:hi, :how, :why, :when, :who, :where, :what, :bye]

  def call

  end
end

Sweet. Now let’s make it do something. I’m going to throw a bunch of code in there, and then we’ll chat (hah again!) about it:

1
2
3
4
5
6
7
8
9
10
11
12
13
14
15
16
class ChatterBox

  COMMANDS = [:hi, :how, :why, :when, :who, :where, :what, :bye]

  def call(sentence)
    sentence.split.each_with_index do |word, i|
      if self.class::COMMANDS.include(word.downcase.gsub(/[.?!,']/,'').to_sym)
        self.send("#{word.downcase.strip.gsub(/[.?!,']/,'')}", sentence.downcase.gsub(/[.?!,']/,'').split)
        break
      elsif i == sentence.length - 1
        puts "I have no idea what you're talking about."
      end
    end
  end

end

The first line is pretty basic: it takes the passed in argument, sentence, splits it up (by default that happens at the spaces) using the .split method, and iterates through that newly-minted array, while keeping track of the index.

And now we move on to the dopeness that is .send.

COMMANDS is just our array of possible commands we want to accept from the user. We first check to see if any word in the sentence that was passed in, when converted to a sybmol matches one of our possible commands. If it does, we get to break out the magic. .send, remember, works like this:

1
object.send("method_as_string", arguments)

So in this case, our object is our instance of the ChatterBox class, and we send it, as a method, the word that matched one of our possible commands. Then, we send the rest of the sentence along as arguments. .send takes care of all of this for us. It converts the string version of the command into a symbol and uses that to call the method of the same name that we’ve written into the class. To that method, it passes the other non-matching part of the sentence.

In other words, say we do something like this:

1
2
c = ChatterBox.new
c.call("What are you doing tonight?")

In the sentence we passed to the .call method, there is one of our commands: ‘What’. .send then gets a hold of this in our .call method and turns it into this:

1
c.send("what", ["are", "you", "doing", "tonight"])

And remembering how the .send method works, we know that this is going to call a method, .what and send it ["are", "you", "doing", "tonight"] as an argument.

So it’s essentially doing this:

1
c.what(["are", "you", "doing", "tonight"])

But we didn’t actually have to hard-code in a call to that .what method.

Pretty neat, right? Based on a passed in sentence, we can fire off a specific method and then use that method to parse a sentence in any way that we want.

One of these (reallyverymessymethodsthatyoushouldonlylookatforliketwosecondssoyoureyesdon’tmelt) methods might look something like this:

1
2
3
4
5
6
7
8
9
10
11
12
13
14
15
16
17
18
19
20
21
class ChatterBox

  COMMANDS = [:hi, :how, :why, :when, :who, :where, :what, :bye]

  def what(args)
    if args.include?("is") && args.include?("your")
      puts "Personal! Sheesh!"
    elsif args.include?("is") || args.include?("are")
      puts "Get a dictionary, bonehead. I'm not Wikipedia over here."
    elsif args.include?("should")
      puts "I ain't a fortune teller, kid. And I certainly don't work for free."
    elsif args.include?("are")
      puts "That's none of your business. I do what I do. Ya herd?"
    else
      puts "Huh?"
    end
  end

  ...

end

I’ll let you go through that and see how poorly a person can actually write a bunch of if statements, but it’s pretty fun to run if you add similar methods for the other possible commands, if I do say so myself. Here’s some sample output from this (ignore the syntax highlighting again):

1
2
3
4
5
6
7
8
9
10
11
12
13
14
15
16
17
18
19
20
21
22
t = ChatterBox.new

t.call("What is your favorite color?")
=> Personal! Sheesh!
t.call("Hi there!")
=> Well hi there! Nice to see you. :)
t.call("Why can't we be friends?")
=> We'd never work together. It's so obvious.
t.call("How old are you?")
=> Younger than yo mama!
t.call("What is the meaning of life?")
=> Get a dictionary, bonehead. I'm not Wikipedia over here.
t.call("Where were you born?")
=> Probably on the moon.
t.call("Who am I?")
=> How in the world could I know that? You didn't tell me your name!
t.call("When can I meet your family?")
=> A long time from now.
t.call("How is cheese made?")
=> I'm not too sure how...I'm a computer, after all.
t.call("Gobledygook blah pants")
=> I have no idea what you're talking about.

Hey, look! We made a really pathetic AIM bot, minus AIM and the internet and other stuff. Ok, really we just made a totally useless program to create a contrived example with which to demonstrate .send. Still, though, it’s really awesome. .send is really awesome, to clarify, not this program. And supremely useful if you want to dynamically call methods based on user input (or in other situations where you don’t really know what method is going to be called).

Not too shabby, Ruby. Not too shabby.

We’ve been spending a lot of time thinking about and implementing test-driven development using RSpec at Flatiron School these past several days. While I certainly love the idea of loving TDD, I’ve found myself struggling to understand exactly how to effectively start dipping my toe into the Ruby testing pool.

It’s not that I don’t grasp the concept of testing first. Rather, I haven’t been able to figure out the appropriate tests to write before I actually start coding. I often find myself combining the following steps:

1. Pseudo coding a solution to the programming problem
2. Thinking of how I could test that pseudo code
3. Thinking of how I could turn that pseudo code into Ruby
4. Thinking of tests to write to test that code

Sadly, this creates a very un-TDD workflow. I either write tests that are completely unrelated to my eventual code, or I end up writing code and then creating tests that conform to that code.

I came across a wonderful deck by Jason Arhart today, though, that has finally (sort of) given me a sense of how to approach this whole TDD thing. This slide in particular was my “aha” moment…

It seems so simple, but the line “focus on what before how” is quite a brilliant way of putting it.

I’d been struggling to write effective RSpec tests (let alone even come up with tests at all) because I was approaching the whole process with a “how” mindset. I thought of my tests in the context of how I’d be solving the programming problem that was before me, rather than as a way to clearly document and test the “what” of the problem. The distinction is nuanced, but the way to properly test is to think, “what should my methods/objects/whatevers be doing?” instead of “how am I going to get my methods/objects/whatevers to solve this problem and also prove to some test that they are working?”

Of course, I still couldn’t whip together a good test suite right now, but this presentation has given me much more clarity as to how I should actually approach writing passable (hah!) test stuites in the near future.

Comments

This isn’t too terribly exciting, but I’ve been on a big “write-everything-in-fact-all-the-things-as-functions-for-bash” kick these last couple of days, and I am pretty happy with my latest one. Though I rarely find myself in the position of having files in my Trash any more, I still occasionally drag something in there from my downloads folder (since they are right next door to one another on my dock). I hate, hate, hate, hate, hate having a cluttered Trash icon, so I empty it all the time.

While it’s totally possible to just press Shift+Command+Delete while in Finder, I’d much rather not have to switch out of terimal if possible. So, I wrote this little function and threw it in my .bash_profile. Now, whenever I want to empty the trash, I just have to type empty. It’s lovely. And as a bonus, I even get to see how many files were deleted.

1
2
3
4
5
6
7
8
9
10
function empty () {
  pushd ~/.Trash > /dev/null
  tmp=$(rm -rfv * | wc -l | sed -e 's/^[ \t]*//')
  if [ $tmp == "1" ]; then
    echo "$tmp file was removed."
  else
    echo "$tmp files were removed."
  fi
  pushd > /dev/null
}

Here’s a commented version if you’re interested. (Note, I looked up the regular expression for one of the commands. Regular expressions are hard.)

1
2
3
4
5
6
7
8
9
10
11
12
13
14
15
16
17
18
19
20
21
22
23
24
25
26
27
28
29
30
31
32
33
# Commented Version
# USE: empty
 
function empty () {
  # push the CWD into the stack and change to the ~/.Trash directory. Pipe this output to /dev/null so it doesn't print to
  # the console

  pushd ~/.Trash > /dev/null

  # assign a variable, tmp, to the following
  # rm -rfv * deletes everything in the trash. the -v flag tells it to echo each file as it deletes
  # this is then piped to wc -l, which counts the lines that were outputted
  # that count gets a bunch of whitespace put in front of it for some reason, and is piped to the stream editor (sed), and the
  # -e flag lets us pass a fancy regex to strip the leading whitespace

  tmp=$(rm -rfv * | wc -l | sed -e 's/^[ \t]*//')

  # check to see if $tmp is 1, if so we want to echo singular "file"

  if [ $tmp == "1" ]; then
    echo "$tmp file was removed."
  else

  # otherwise echo plural "files"

    echo "$tmp files were removed."
  fi

  # pushd again brings us back to the directory we were in before running the command, and the output is again piped to
  # /dev/null

  pushd > /dev/null
}
Comments

Today was full of pulling and fetching and branching and merging and commiting and, yes, the dreaded rebasing. I’ll admit: before today, though I’d read about it on multiple occasions, rebasing in Git still made my brain physically hurt. And even as today wore on, I found myself more and more perplexed by this scary, repo-busting command.

Until I had an epiphany.

Git rebasing makes sense when you realize that it does exactly what the name says it’ll do. Stick with me here.

Let’s, for a second, imagine we have a repo that looks something like this:

A possible Git repository

Now, let’s throw out all we know about rebasing (or think we know about rebasing), and just concentrate on what the command actually says. If we rebase feature onto master, we are literally changing the base (or parent!) of feature.

Let’s look at the repo again, but this time with a bit more descriptors:

A more verbose Git repository

As it stands, feature begins it’s life as a child of our second commit. If we rebase it onto master we are essentially saying, “Nope, let’s rewrite history. Let’s pretend that feature began it’s life as a child of our sixth commit (the most current commit in the master branch).” So to make this rebase happen, we run the following commands:

1
2
git checkout feature
git rebase master

What Git does, to rewrite history, is take every commit between C2 and C6 (inclusive) and apply it to the feature branch. Because, for the feature branch to have a new base, it needs to know the whole history of that particlar base (parent).

(Essentially, feature needs to get caught up. And for that to happen, it needs to “know” everything the master branch “knows” up until the current moment. And how can that happen? Git has to, one by one, apply every change (commit) in master’s history to feature.)

Now, our repo looks like this:

A Git repository after rebasing

Woah! Now we have a nice clean history (it’s all linear and stuff!), but feature is ahead of master. Why is that?

This is what initially confused the heck out of me, once I thought I understood rebasing. There’s two things to keep in mind for this to make sense:

  • The whole “rebase onto” nomenclature is, in and of itself, somewhat confusing.
  • If we hadn’t rebased or merged, the master branch would never have any concept of the feature branch after our second commit.

Let’s tackle these points one at a time.

1) The whole “rebase onto” nomenclature is, in and of itself, somewhat confusing.

Here’s the thing. Everything I’ve written before this is based upon the fact that the rebase command actually does what it’s name implies. Cool. However, when we add the word “onto” into the mix, things get confusing. To me, rebase onto (combined with the myriad descriptions of rebasing as the rewinding of and playing back of commits onto one branch or another) makes it seem as if the branch being, erm, rebased onto, is being acted upon in some way.

It isn’t.

2) If we hadn’t rebased or merged, the master branch would never have any concept of the feature branch after our second commit.

Let’s look at another version of our original repo, but with some files added to the mix. (Each time you see a file name next to a commit, this means the file was created and commited in that commit. These are simplistic commits for explanation purposes.)

A Git repository with some files

Cool. Now let’s look at the same repository, but this time with the files carried through from one commit to the next. In other words, now we’ll look at what files each commit knows about:

A Git repository with some files and inheritance

Now, if we created a new branch off of master right now, what files would it inherit?

If you said files 1, 2, 3, 8, 9, and 10, then you’d be right.

So if we rebase a branch onto master now, it too would know about those files. (It’s new parent is our current master branch, and thus inherits everything from that branch.)

A Git repository with some files and inheritance after rebase

But if you notice from that image above, our master branch has no clue that files 4, 5, 6, and 7 exist. Rebasing our feature branch, which does know about those files, onto master just means that now feature knows about files 1, 2, 3, 8, 9, and 10, just as any new branch would at this point!

Aha! So in order to catch master up on all the lovely things that we’ve been working on in feature branch, we still need to merge after the rebase is complete. And then, we get this:

A Git repository after rebase and merge

But, bonus side effect: we don’t have to worry about conflicts. Sweet.

Phew. Git rocks.

Comments

Hi, kids. The name’s Logan. Let’s see what happens when I go ahead and publish this post.

Look, it worked!

Go checkout my first real post